🎯 Lead Generation Action
The Lead Generation Action allows your AI Agent to collect customer information such as names, phone numbers, emails, project requirements, and other details.
Collected leads can be sent to:
- Telegram
- Google Sheets
This is useful for service businesses, agencies, clinics, consultants, and any company that wants to automatically capture potential customers.
📍 Creating a Lead Generation Action
Navigate to:
AI Agents → Select AI Agent → AI Actions → Create Action → Lead Generation
Step 1: Create the Action
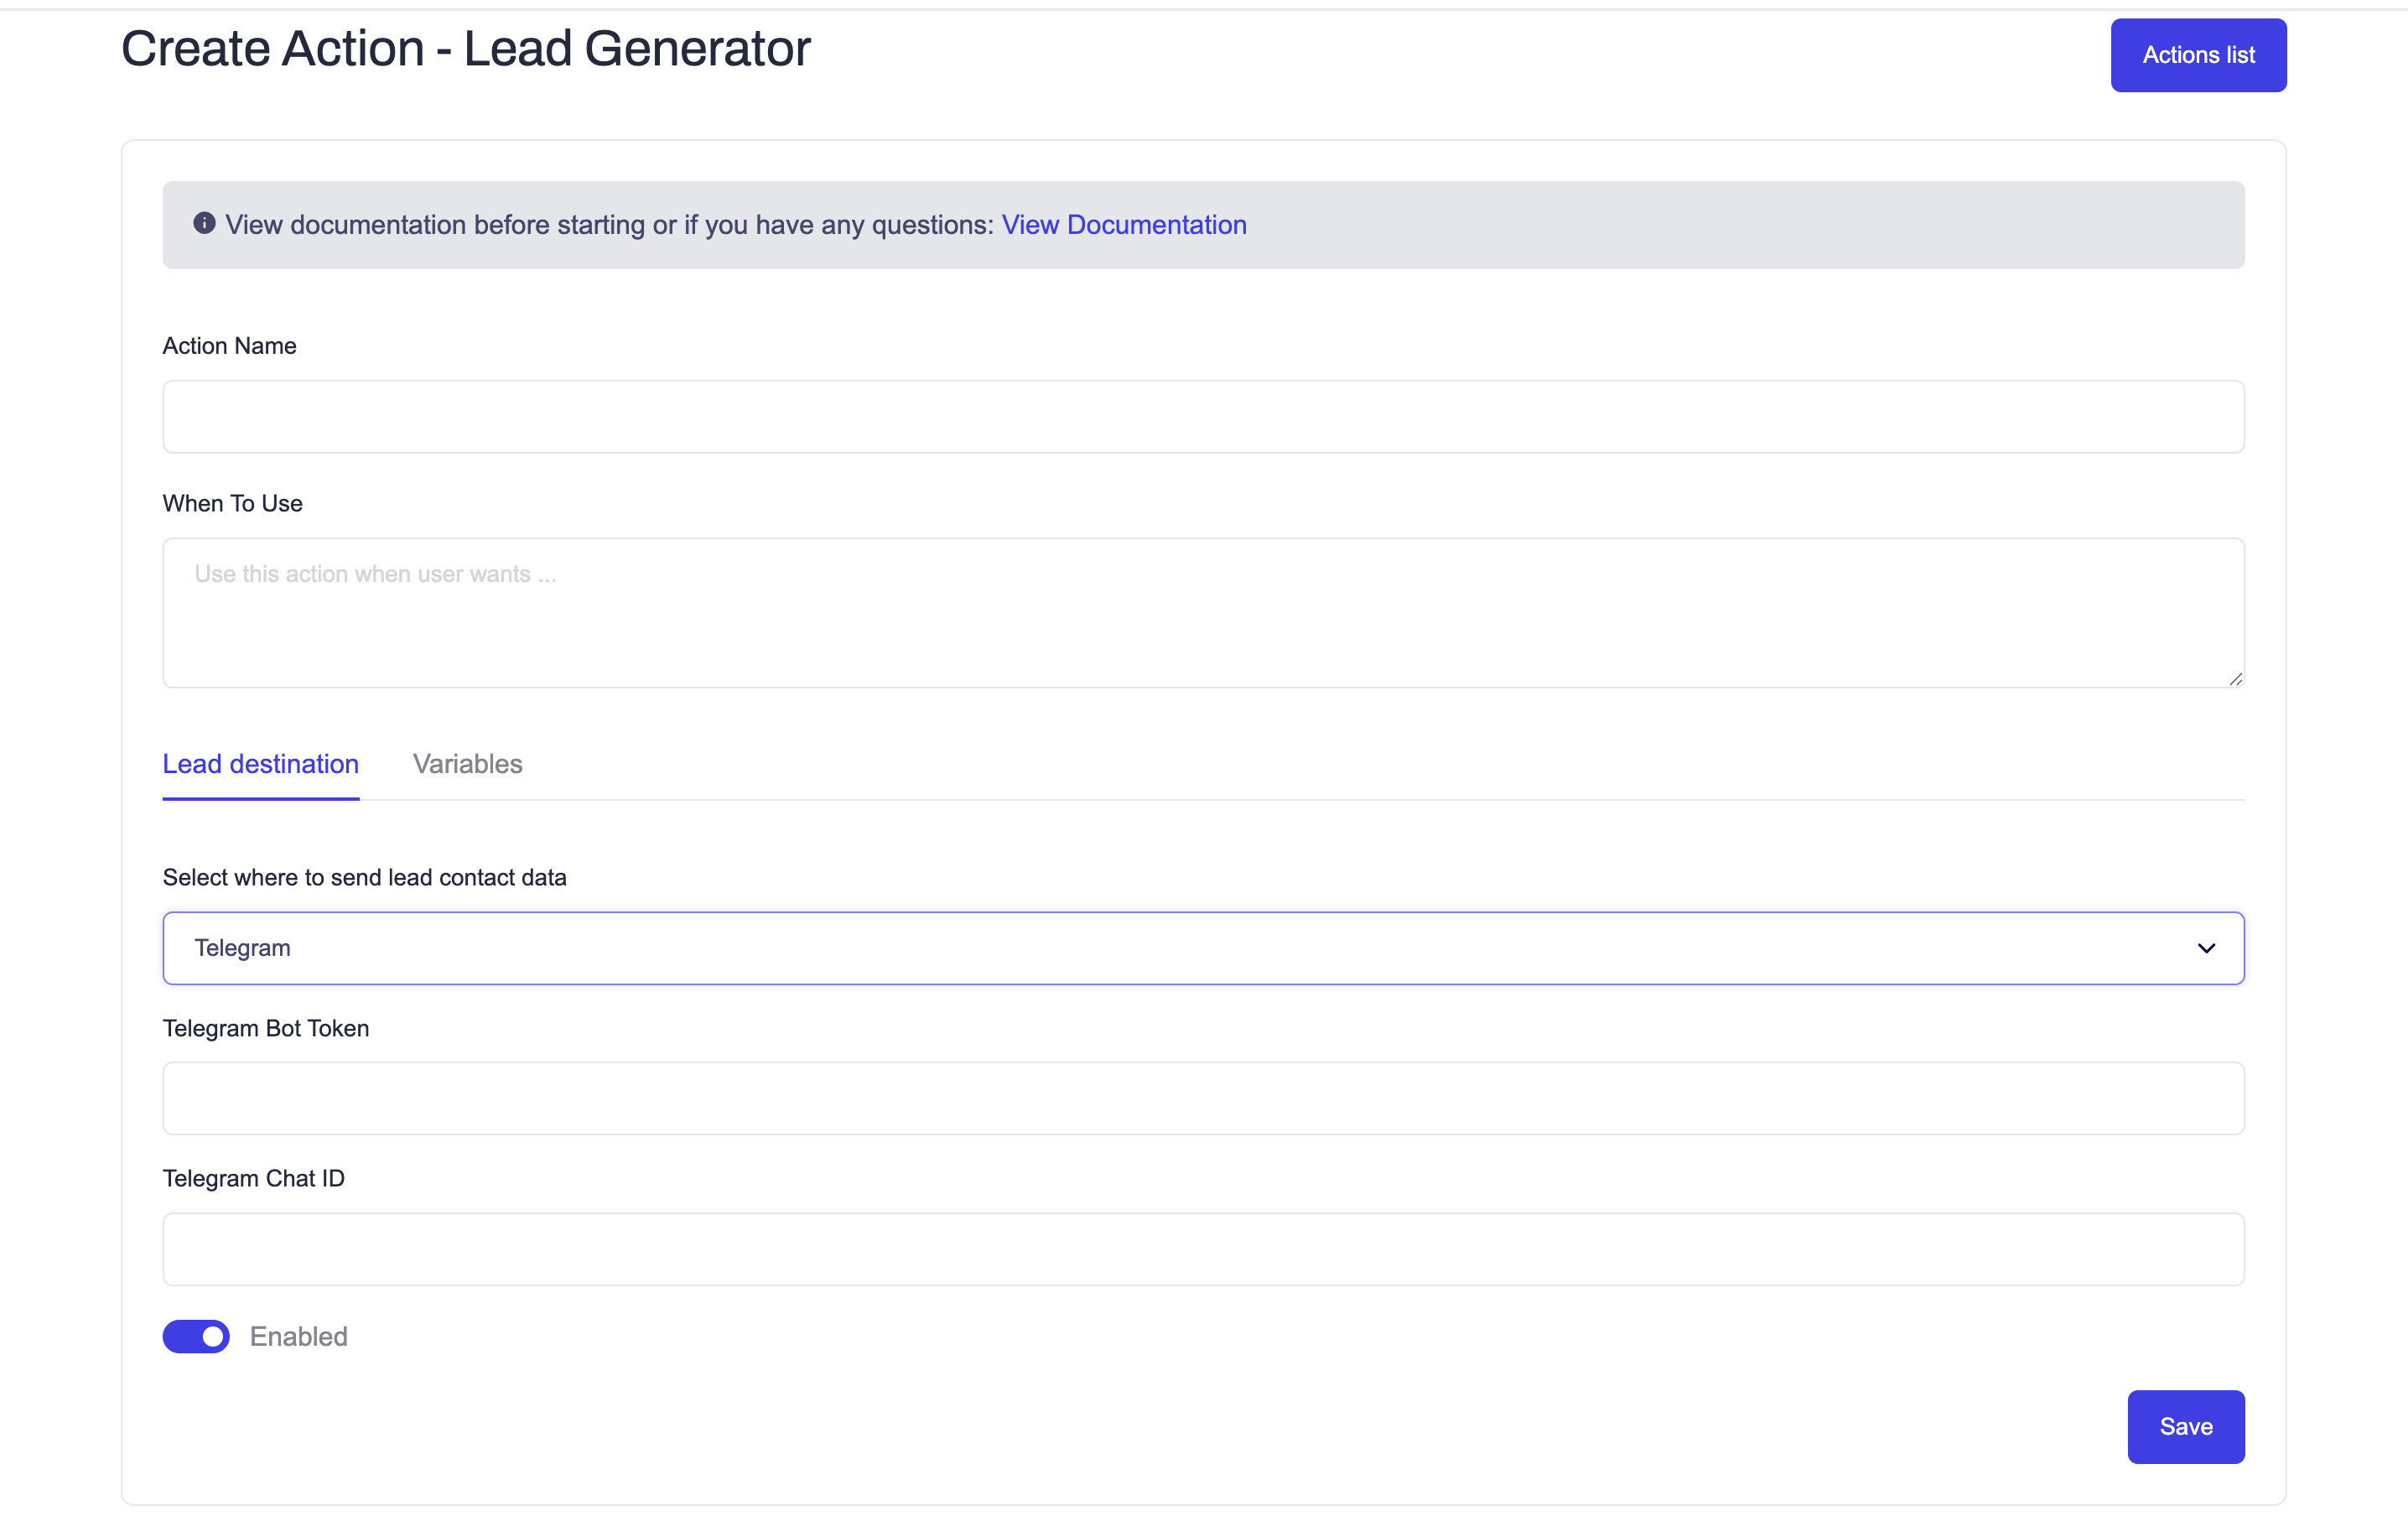
Fill in the basic information:
| Field | Description |
|---|---|
| Action Name | Internal name for your lead generation action |
| When To Use | Instructions for AI explaining when this action should be triggered |
Example:
- Action Name:
Web Development Lead - When To Use:
Use this action when a customer wants to order website development services.
📥 Step 2: Select Lead Destination
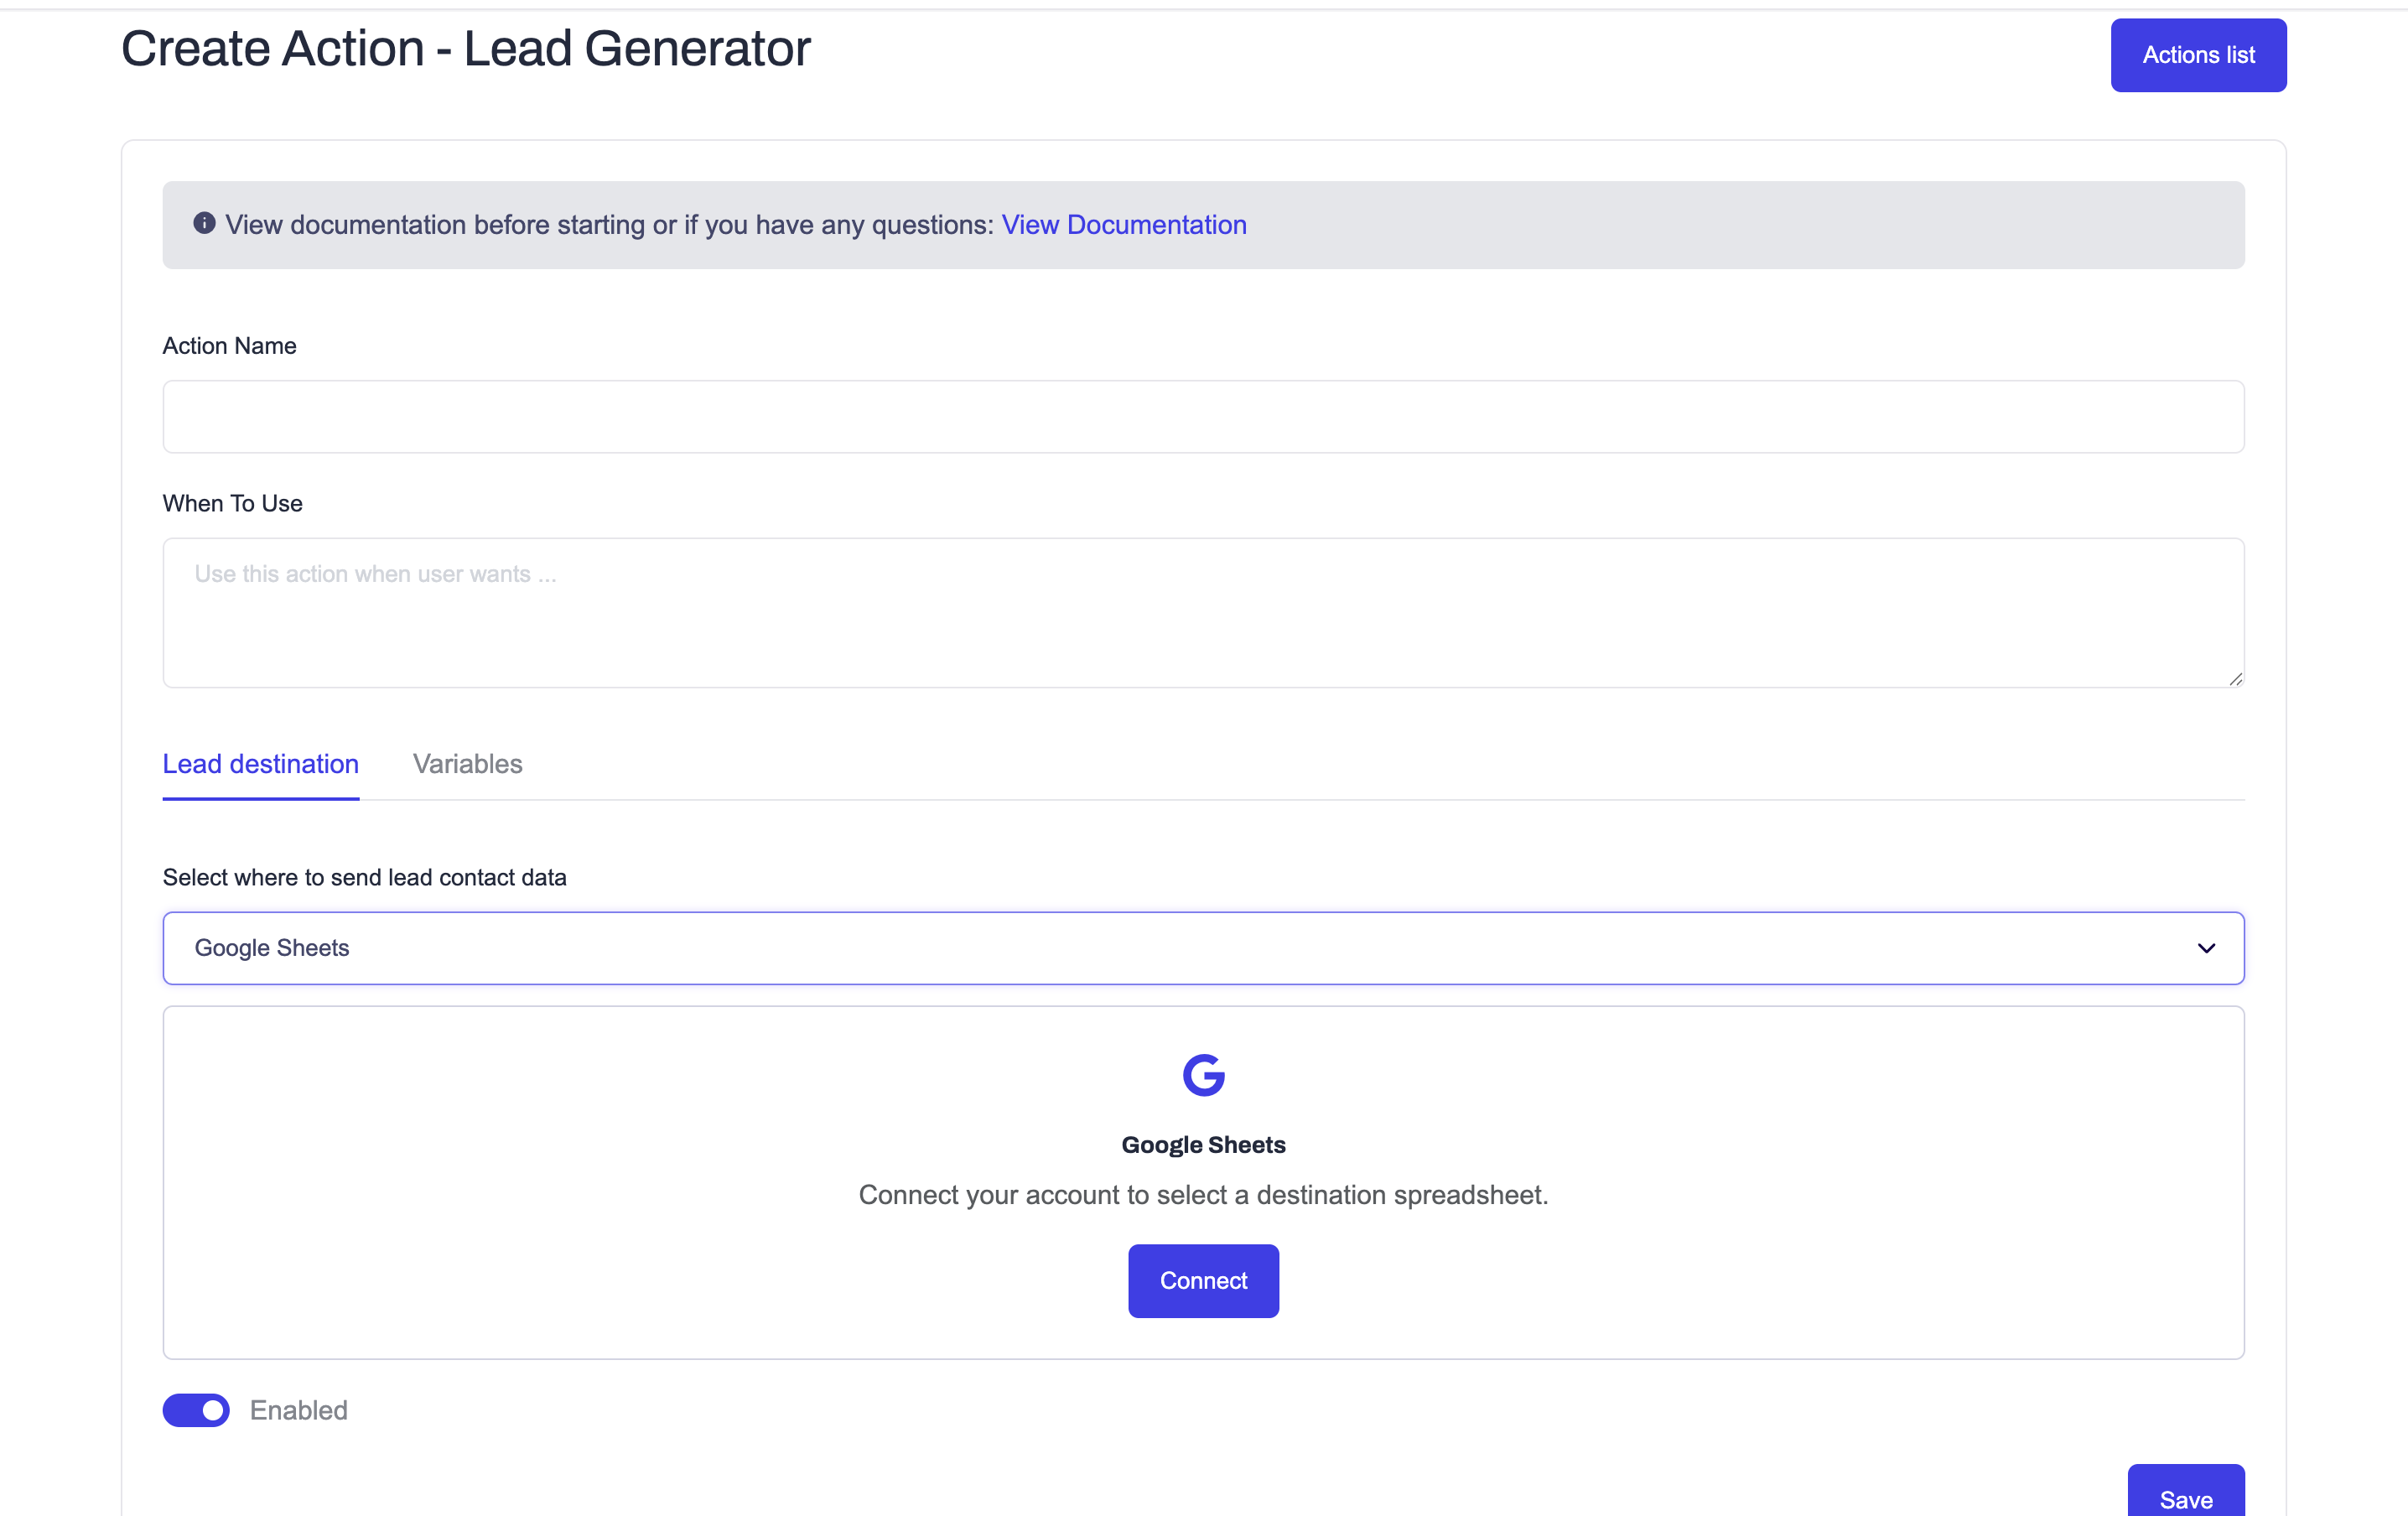
Open the Lead destination tab and choose where collected lead information should be delivered.
Available destinations:
Telegram
Send collected leads directly to a Telegram chat.
Required fields:
| Field | Description |
|---|---|
| Telegram Bot Token | Your Telegram bot token |
| Telegram Chat ID | Chat ID where leads will be sent |
Google Sheets
Store leads automatically inside a Google Spreadsheet.
To use Google Sheets:
- Click Connect
- Authorize your Google account
- Select an existing spreadsheet using Google Picker
🧩 Step 3: Configure Variables
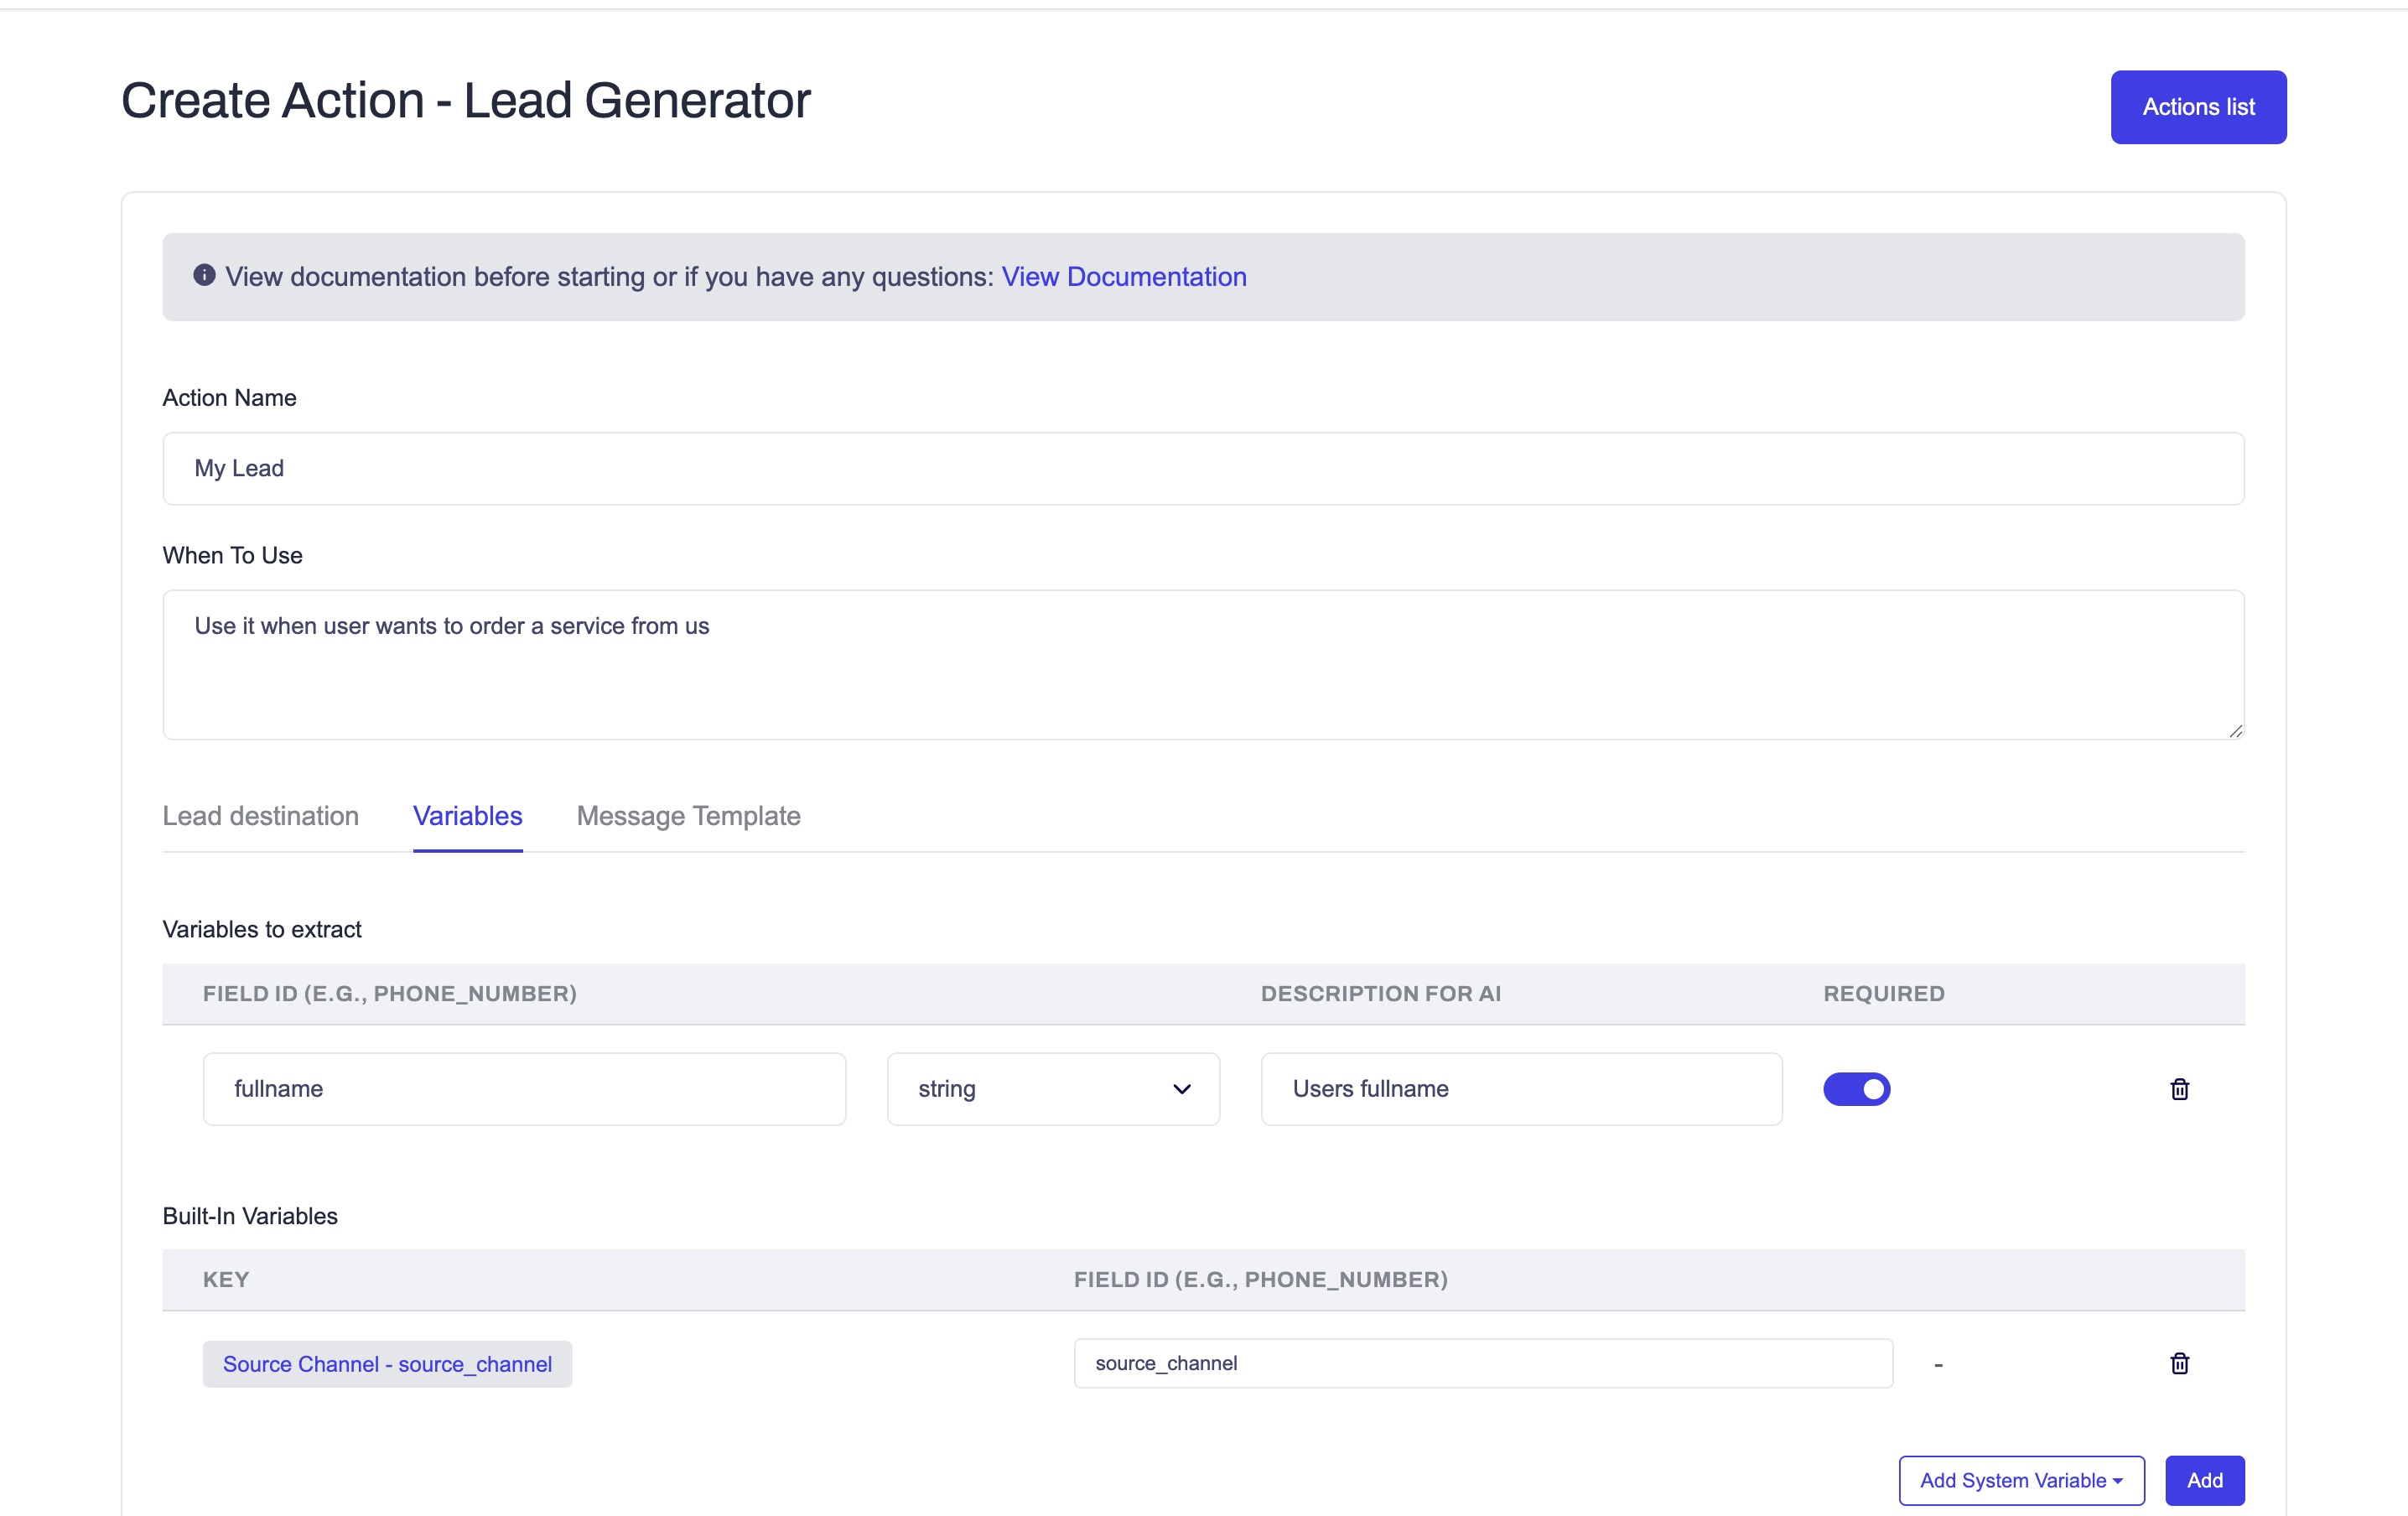
Open the Variables tab.
Variables define what information the AI should collect from customers.
Variable field_id can have only English letters, numbers, dash, underscore
Each variable row contains:
| Column | Description |
|---|---|
| Field ID (e.g., phone_number) | The internal identifier the AI uses for this value |
| Description for AI | Explains to the AI what this field means and how to collect it |
| Required | If enabled, the AI must collect this value before submitting the lead |
Examples:
| Field ID | Description |
|---|---|
| fullname | Customer full name |
| phone_number | Customer phone number |
| Customer email address | |
| company_name | Company name |
| project_details | Project requirements |
The AI will continue asking questions until all required fields are collected.
To add a variable, fill in the row and click Add.
⚙️ System Variables
Ainisa automatically provides several built-in variables.
Inside the Variables tab, click the Add System Variable dropdown to insert one.
Example:
| Variable | Description |
|---|---|
| source_channel | Source of the conversation (Website, Telegram, WhatsApp, Instagram, etc.) |
These variables do not need to be collected from the user manually — they are populated automatically by Ainisa.
🔧 Allowed Operations
The Allowed operations section defines what the AI is permitted to do with a lead/order.
| Operation | Description |
|---|---|
| Create | Create a new lead (enabled by default) |
| Update | Modify an existing lead |
| Cancel | Cancel an existing lead |
Important notes:
- To make Update and Cancel work reliably, you must also describe in the When To Use field when the assistant should call them. Otherwise the AI may not trigger them correctly.
- If Google Sheets is connected, cancelled items are not deleted. Instead, the row background is changed to red.
💬 Step 4: Configure Telegram Message Template
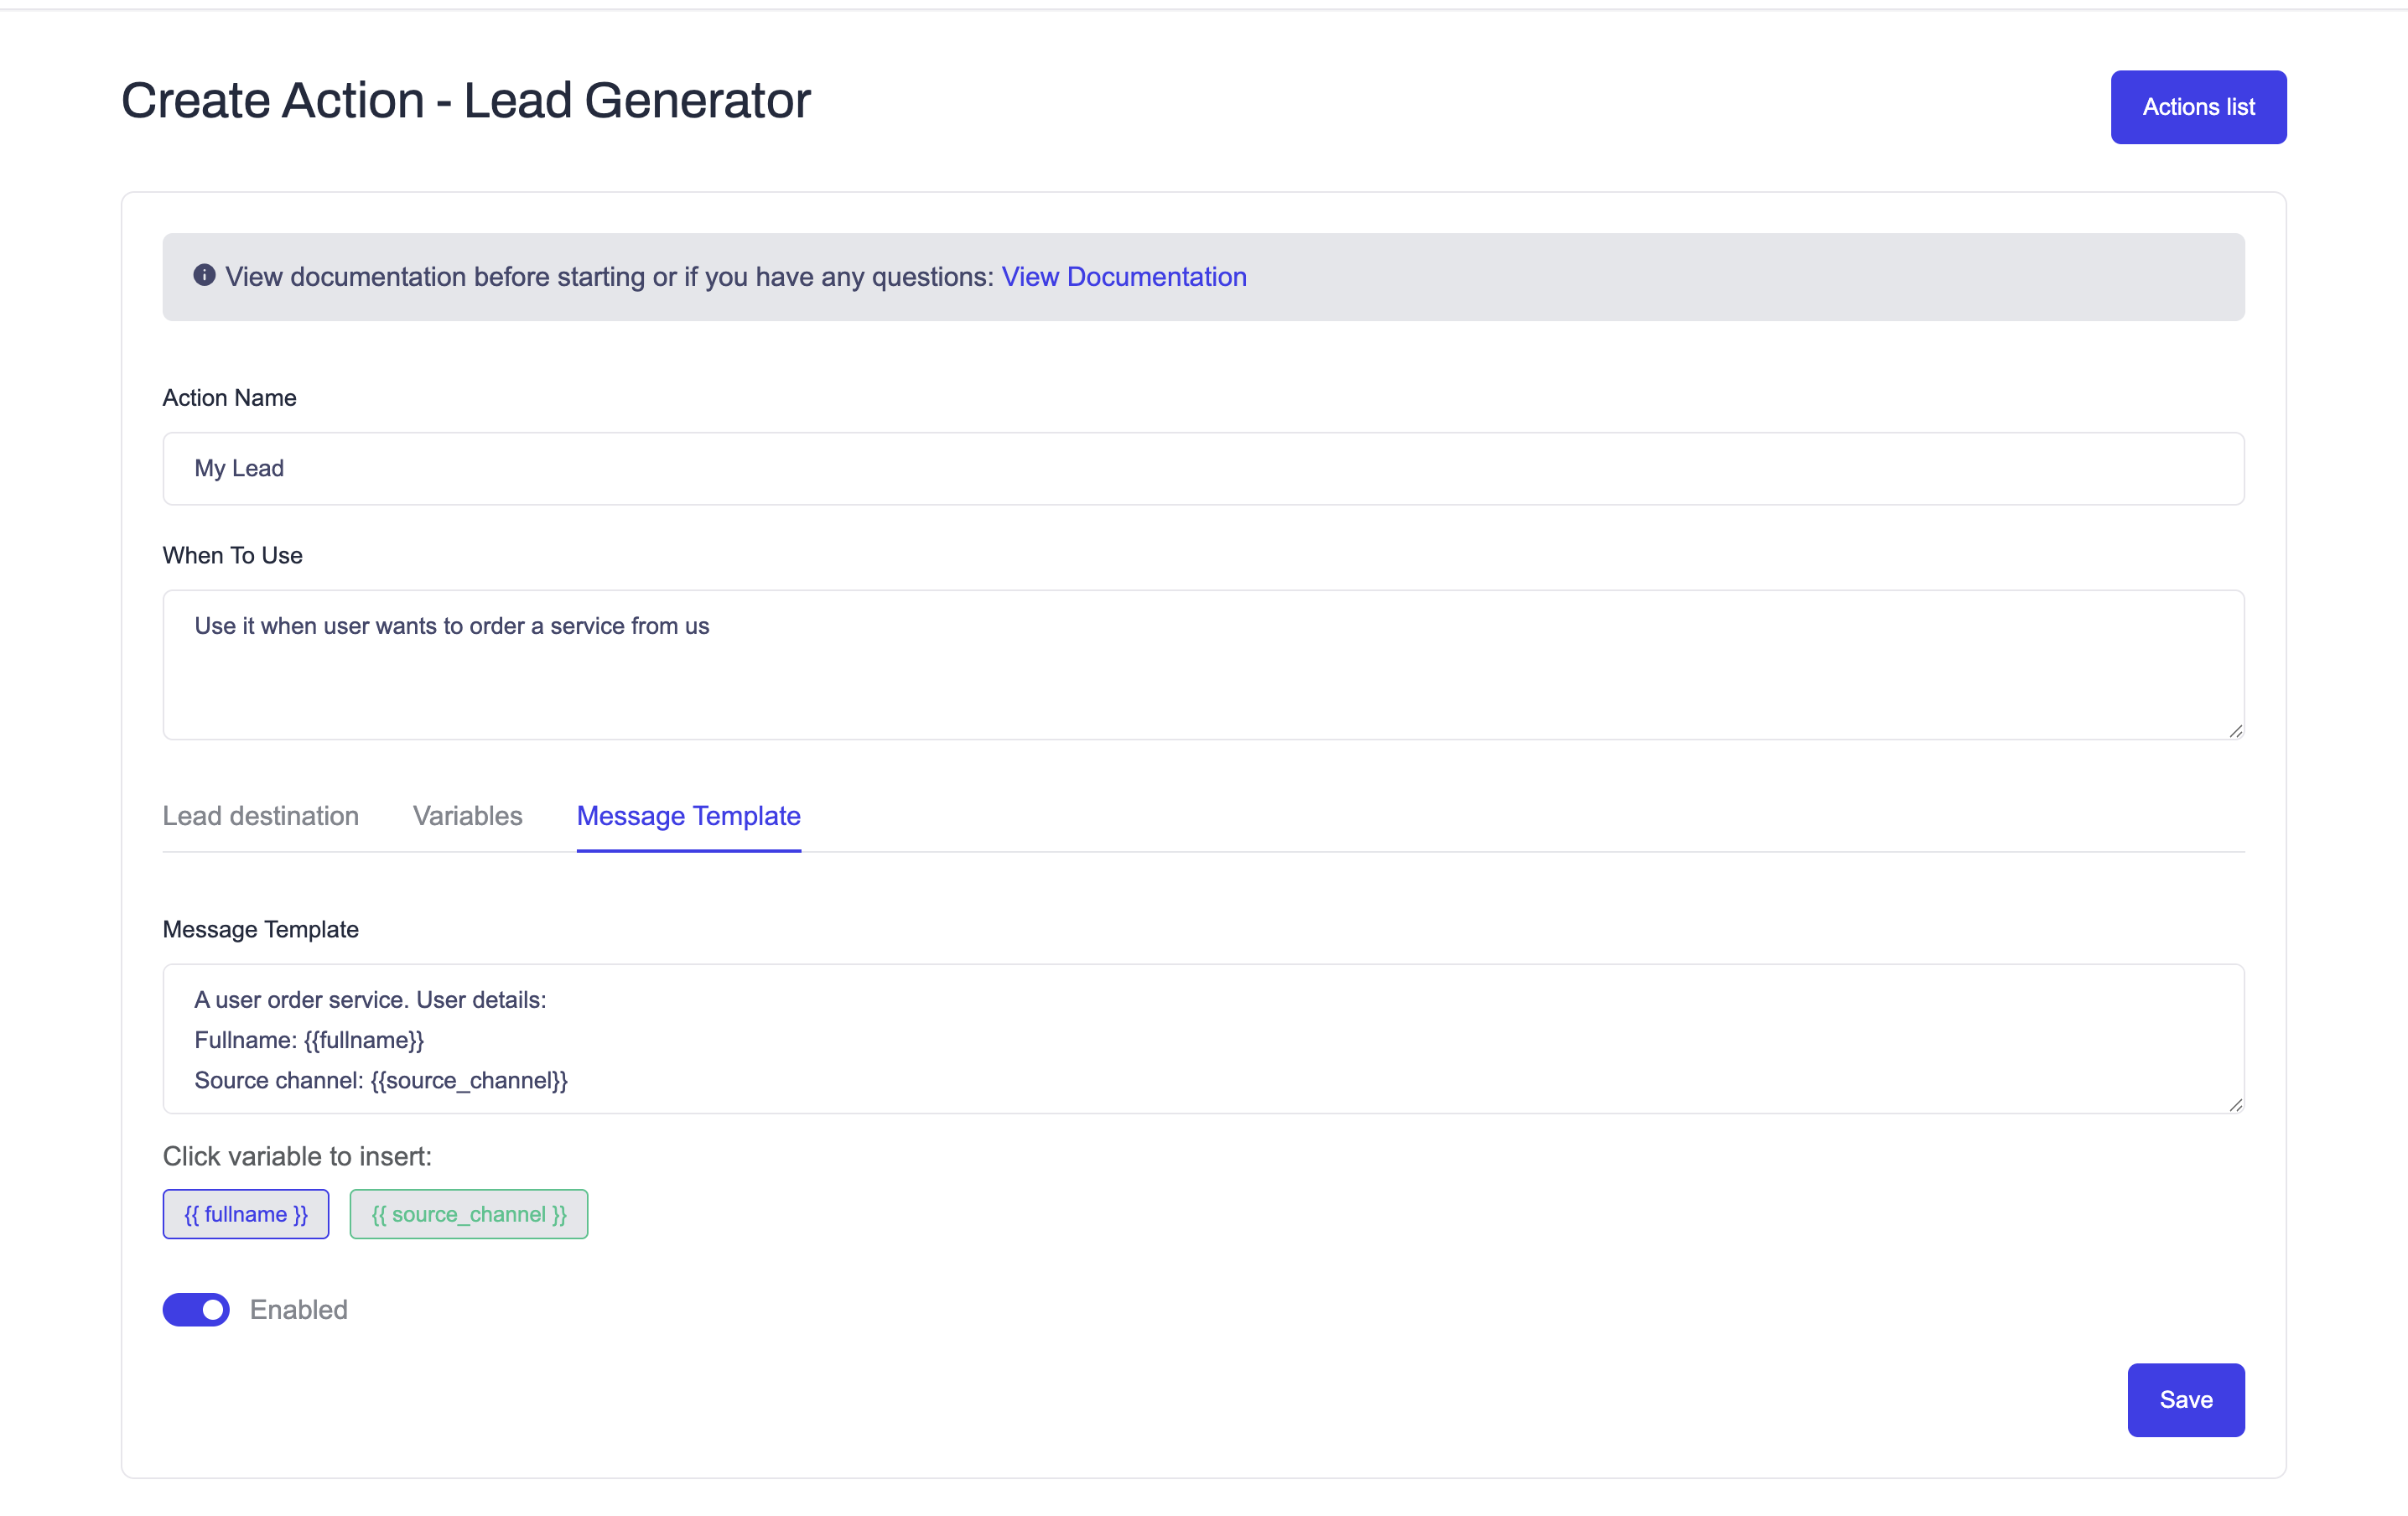
If Telegram is selected as the lead destination, open the Message Template tab.
This template defines the message that will be sent to Telegram after the AI collects lead information.
You can insert variables into the template.
Example:
A new lead has been received.

Full Name: {{fullname}}
Phone Number: {{phone_number}}
Source Channel: {{source_channel}}
The AI will automatically replace variables with collected values.
📊 Google Sheets Mapping
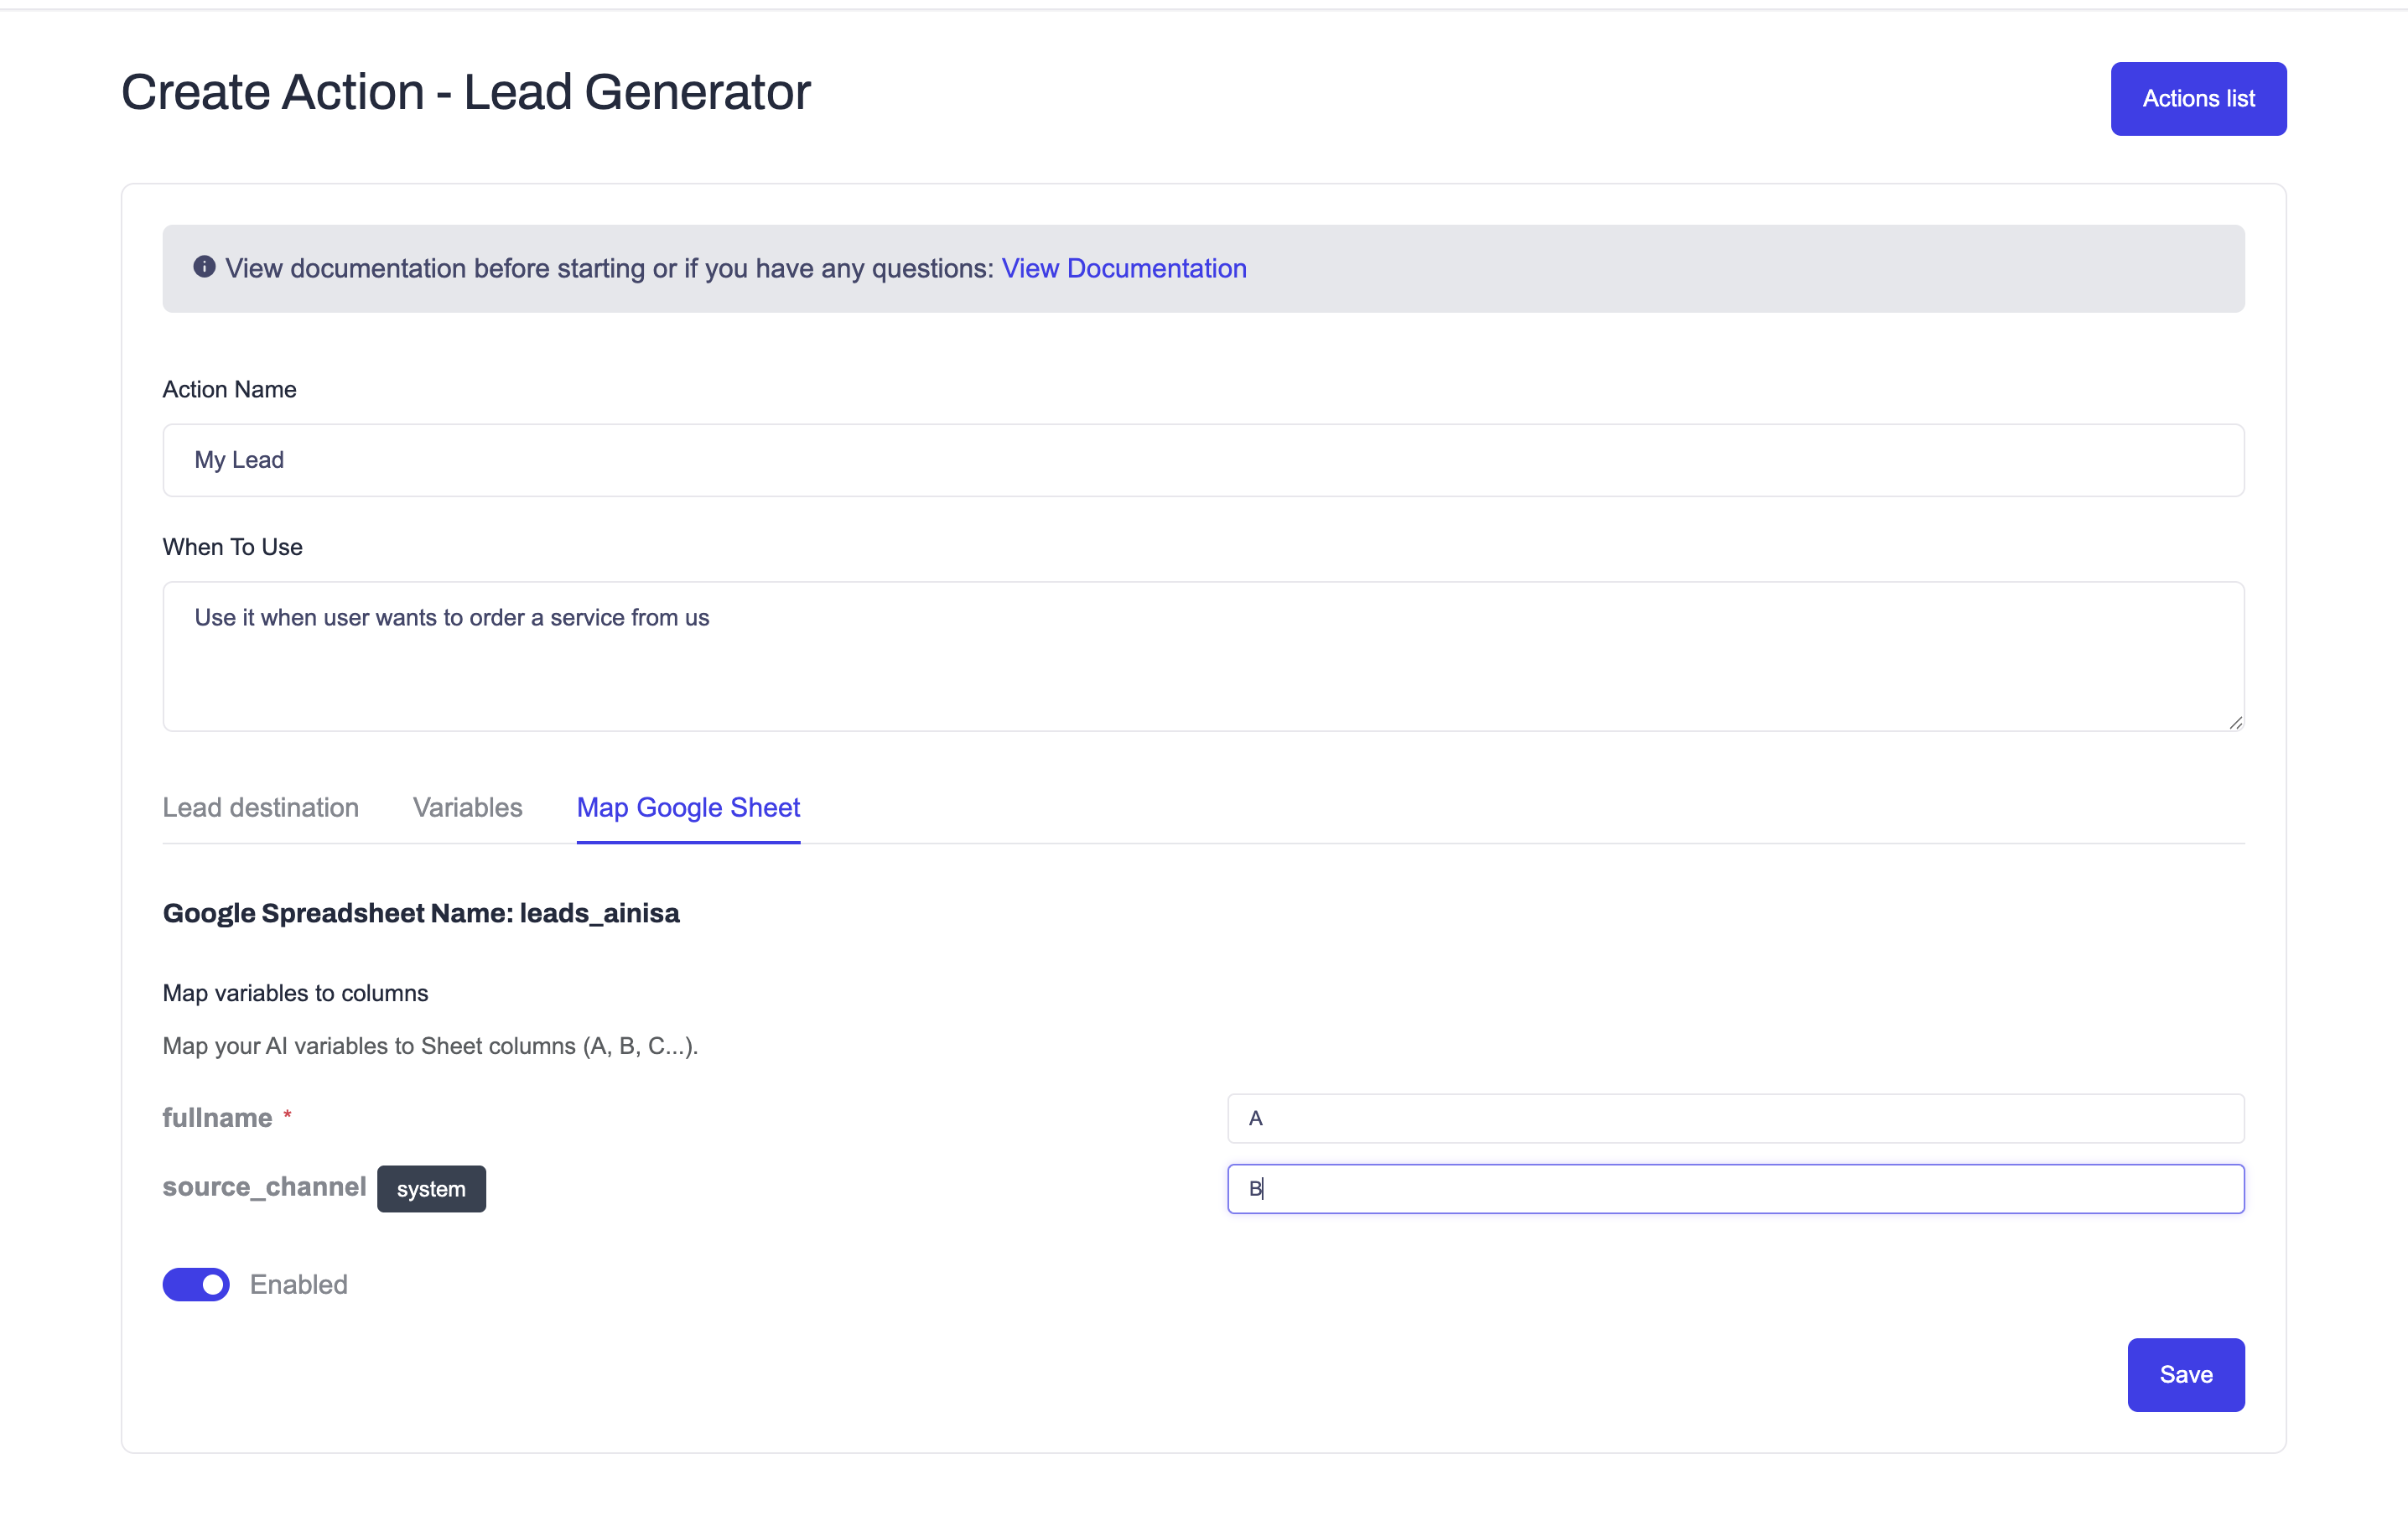
If Google Sheets is selected as the destination, collected data will be added directly to the connected spreadsheet.
You can map variables to spreadsheet columns.
Example:
| Spreadsheet Column | Variable |
|---|---|
| A | fullname |
| B | phone_number |
| C | |
| D | source_channel |
🏷️ Tagging (Premium)
Note: Tagging is available only on paid plans.
Open the Tagging tab to let the AI automatically add tags to the chats where a lead is created. This helps business owners quickly find and filter chats by tag.
Tags are assigned per operation — you can set a different set of tags for Create, Update, and Cancel.
Example:
- Create →
Booked - Update →
Rescheduled - Cancel →
Cancelled
When the AI performs one of these operations, the matching tags are automatically applied to the AI chat.
Important: Tags can only be configured for operations that are enabled in Allowed operations. If an operation (e.g. Update) is not selected there, you cannot assign tags for it.
Use Manage your tags here to create and organize your tags.
🔔 Notifications & Status
At the bottom of the action, two toggles are available:
| Toggle | Description |
|---|---|
| Notify me on the dashboard | When enabled, the business owner and online team members receive a real-time sound notification whenever a new lead is created |
| Enabled | Turns the action on or off. When disabled, the AI will not use this action |
💡 Example Workflow
- Customer visits your website
- Customer asks for a service
- AI detects that a lead should be created
- AI collects required information
- Lead is sent to Telegram or Google Sheets
- The chat is automatically tagged (if Tagging is configured)
- Your team receives a real-time notification instantly
Example collected information:
- Full Name
- Phone Number
- Service Needed
- Budget
- Source Channel
✅ Notes
- Multiple Lead Generation Actions can be created for a single AI Agent.
- Variables marked as required must be collected before submission.
- Telegram destination requires a valid Bot Token and Chat ID.
- Google Sheets destination requires Google account authorization.
- System variables are automatically populated by Ainisa.
- Update and Cancel operations should be described in When To Use to work reliably.
- Tagging is a paid feature and only supports operations enabled in Allowed operations.