⚙️ Configuring an Integration
Once an integration is connected, you can configure how it behaves — which AI Assistant answers, whether the assistant's name is shown, and when it's allowed to respond.
🧭 How to Open the Configuration Page
- Go to https://ainisa.com/business/integrations.
- Find the integration you want to set up and click the ⋯ (three dots) on its right side.
- From the dropdown, click Configure.
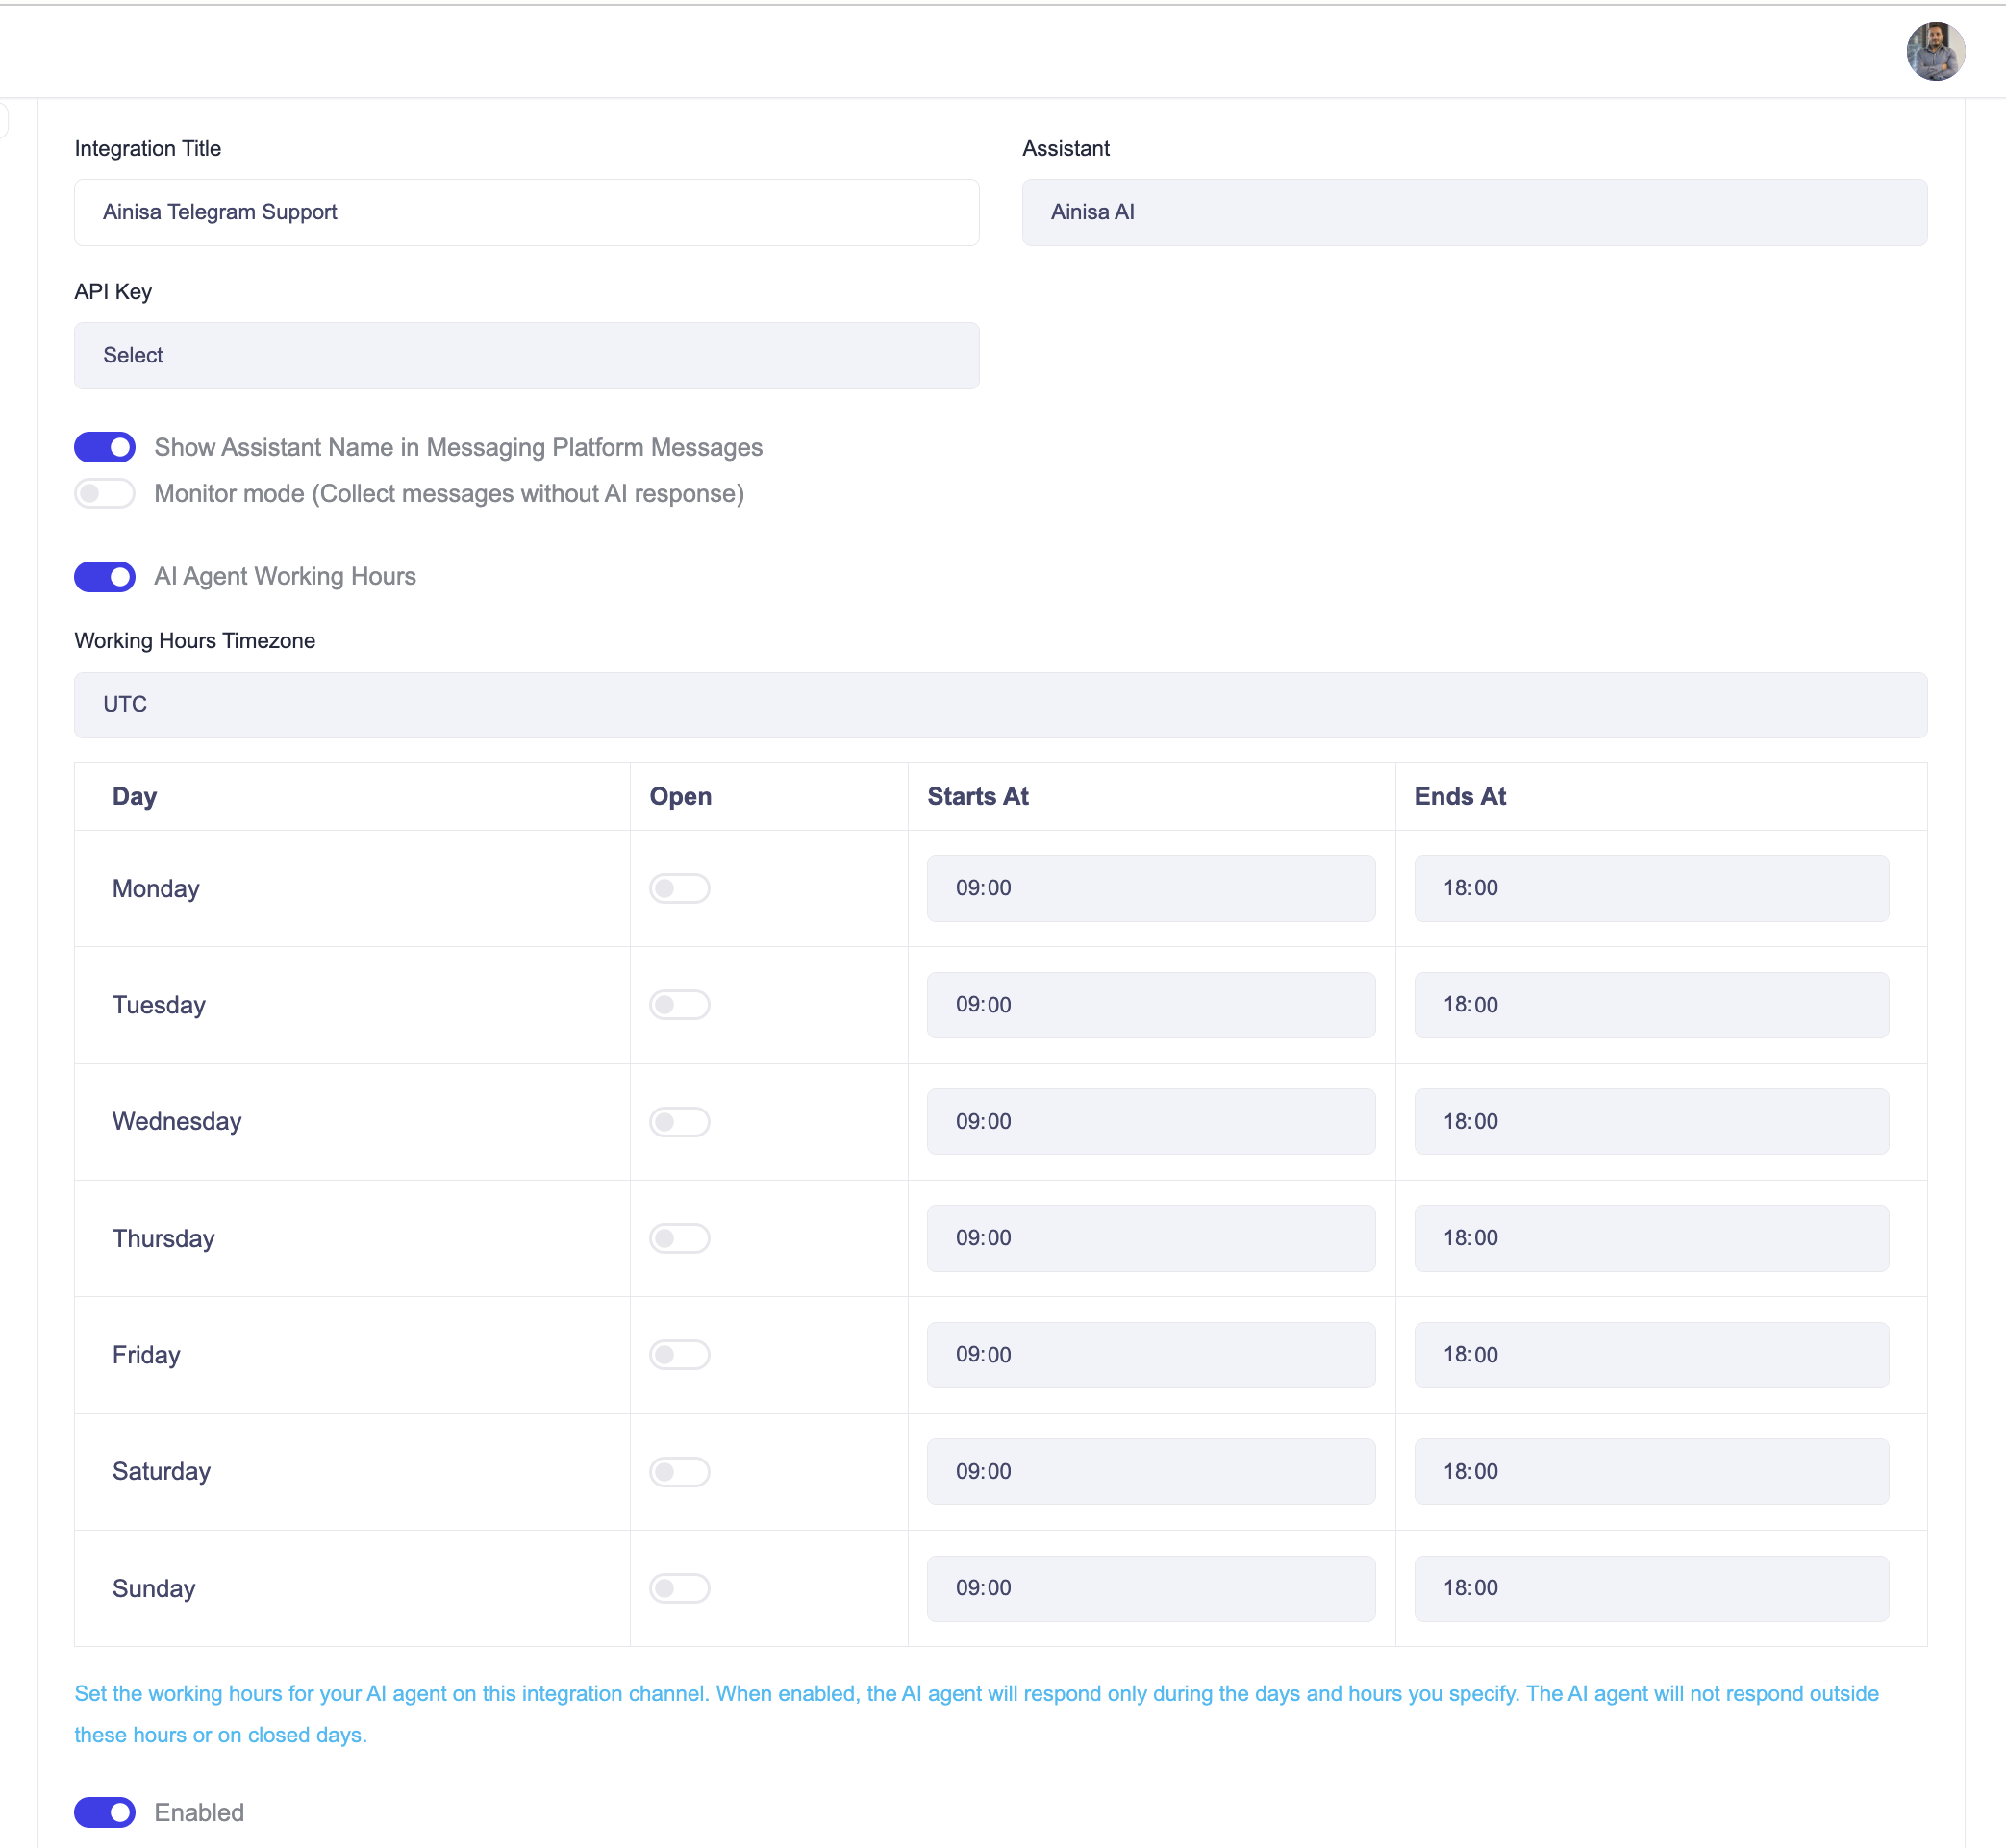
This opens the configuration page shown below.
🛠️ Configuration Options
Integration Title
A name to help you identify this integration inside Ainisa (for example, Ainisa Telegram Support).
Assistant
Choose which AI Assistant will handle conversations on this channel.
API Key
Select the API key this integration should use to operate.
Show Assistant Name in Messaging Platform Messages
When enabled, the AI agent's name appears in the messages it sends on the connected platform (for example, in the messages the AI sends on Instagram). Turn it off to keep replies unbranded.
Monitor Mode (Collect messages without AI response)
When enabled, the AI agent stays completely silent for this integration — incoming messages are still collected and shown in your dashboard, but the AI does not reply to them.
AI Agent Working Hours
When enabled, the AI agent responds only during the days and hours you specify. Outside those hours or on closed days, it will not respond.
- Working Hours Timezone — set the timezone the schedule is based on (for example, UTC).
- Day / Open / Starts At / Ends At — for each day of the week, toggle Open on to let the AI agent work that day, then set the start and end times.
Enabled
Turns the whole integration on or off.